Non-Destructive Avocado Ripeness Detection with
Laser-Light Backscattering Imaging
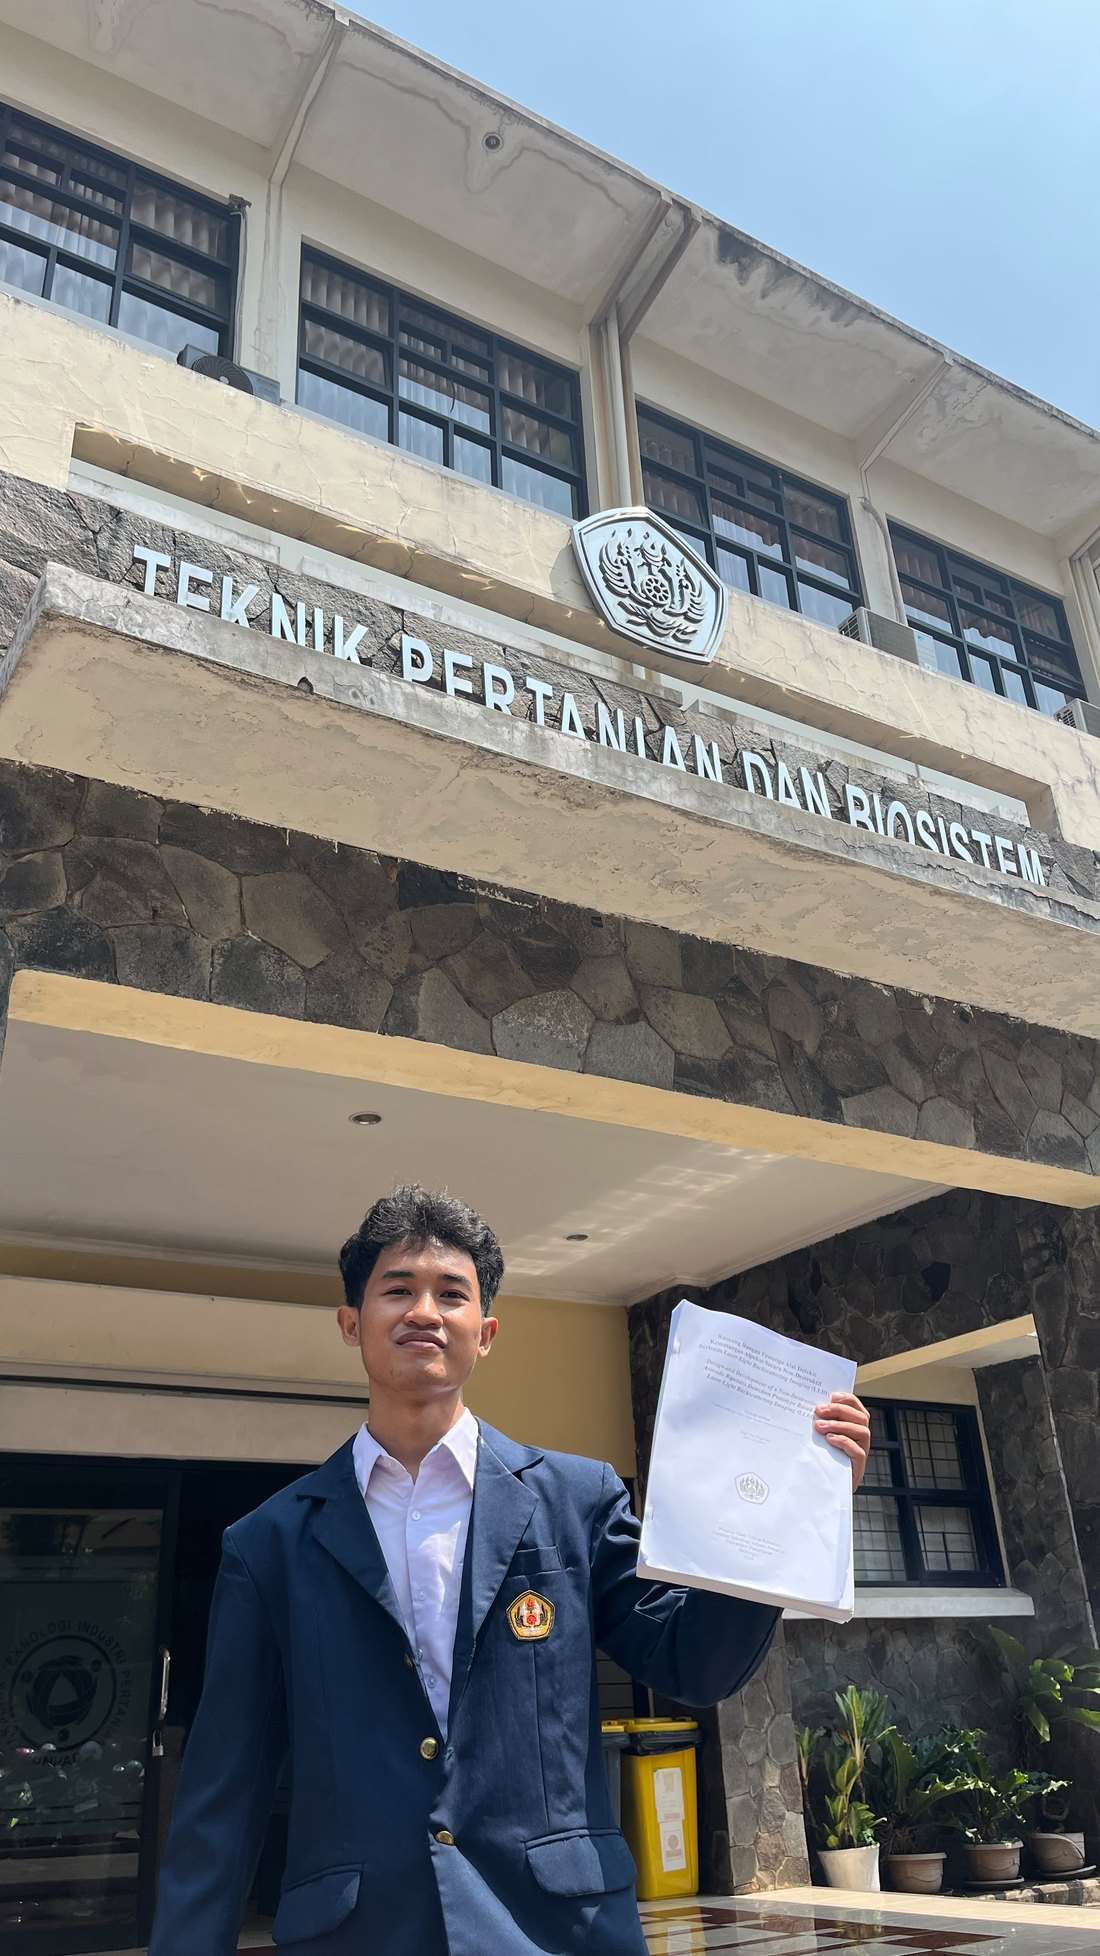
"Rancang Bangun Prototipe Alat Deteksi Kematangan Alpukat Secara
Non-Destruktif Berbasis Laser-Light Backscattering Imaging (LLBI)"
Padjadjaran UniversityAgricultural Engineering and BiosystemsRaspberry Pi 4BSVM & CNN
Why I built this
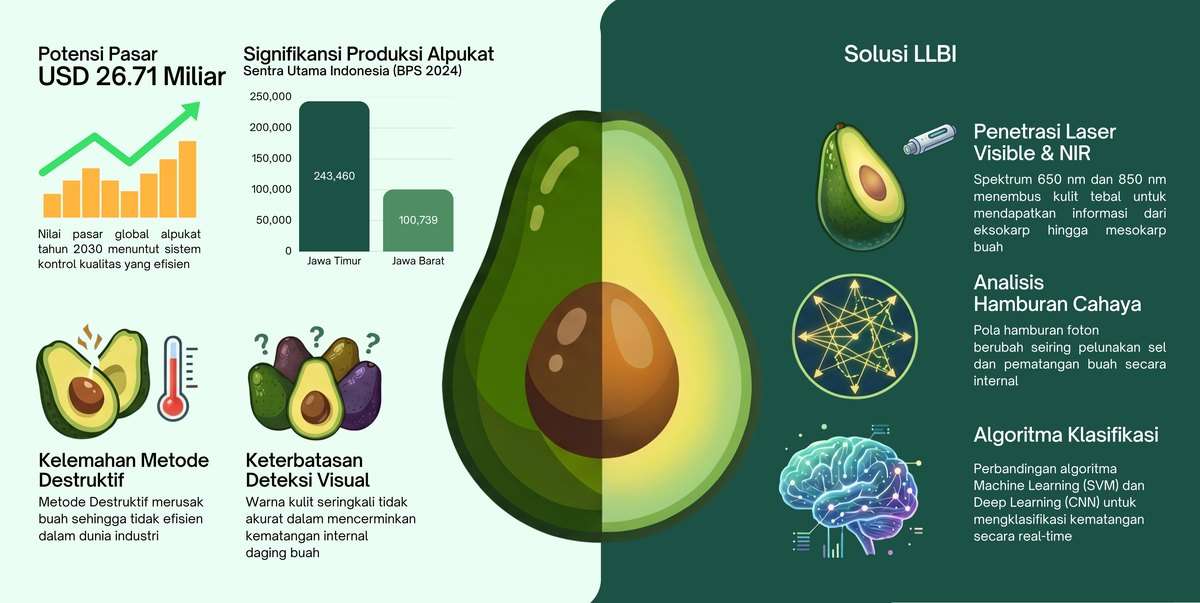
Avocado quality is usually checked the old way: squeeze it, cut it
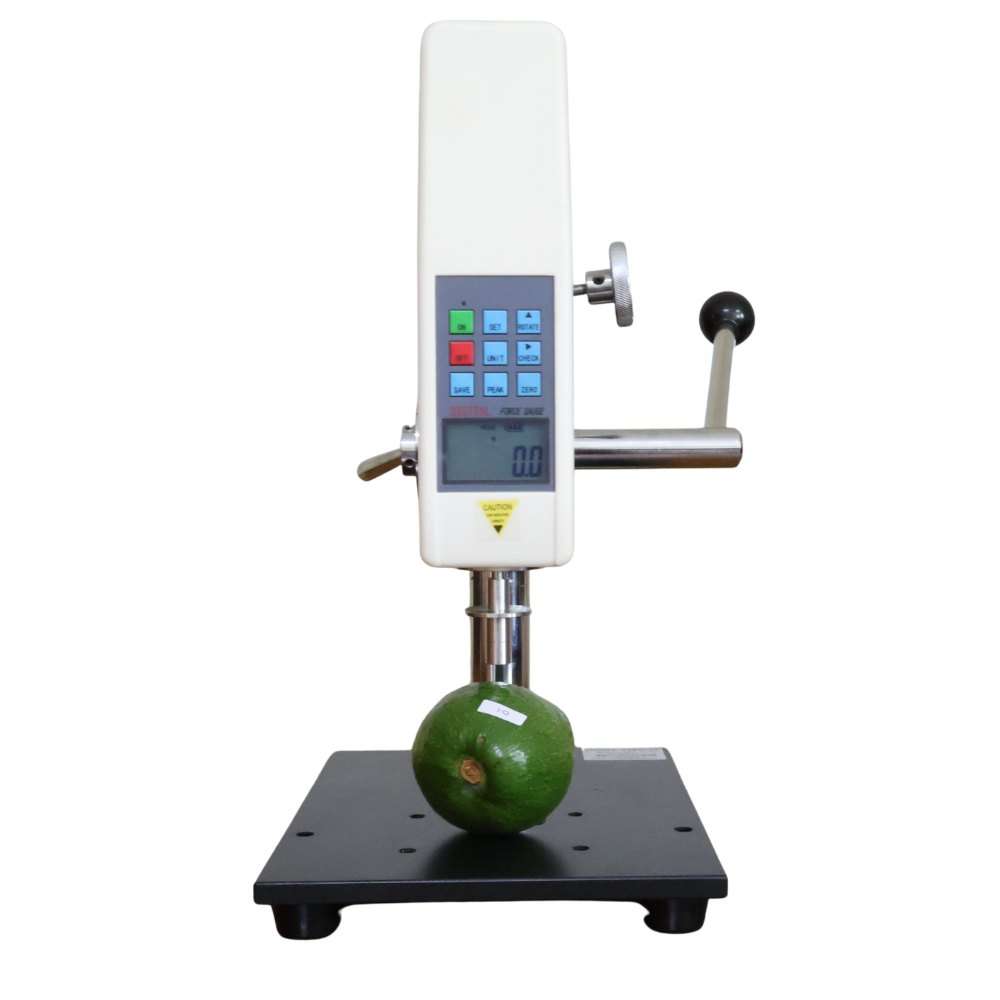
open, or punch it with a penetrometer. All of those are subjective or
destructive, and none of them scale for a buyer or a processor who
wants to know now whether a fruit is ready. For my
undergraduate thesis at Padjadjaran University I asked a simple
question: can a small, portable device tell whether an avocado is
ripe without touching or cutting it?
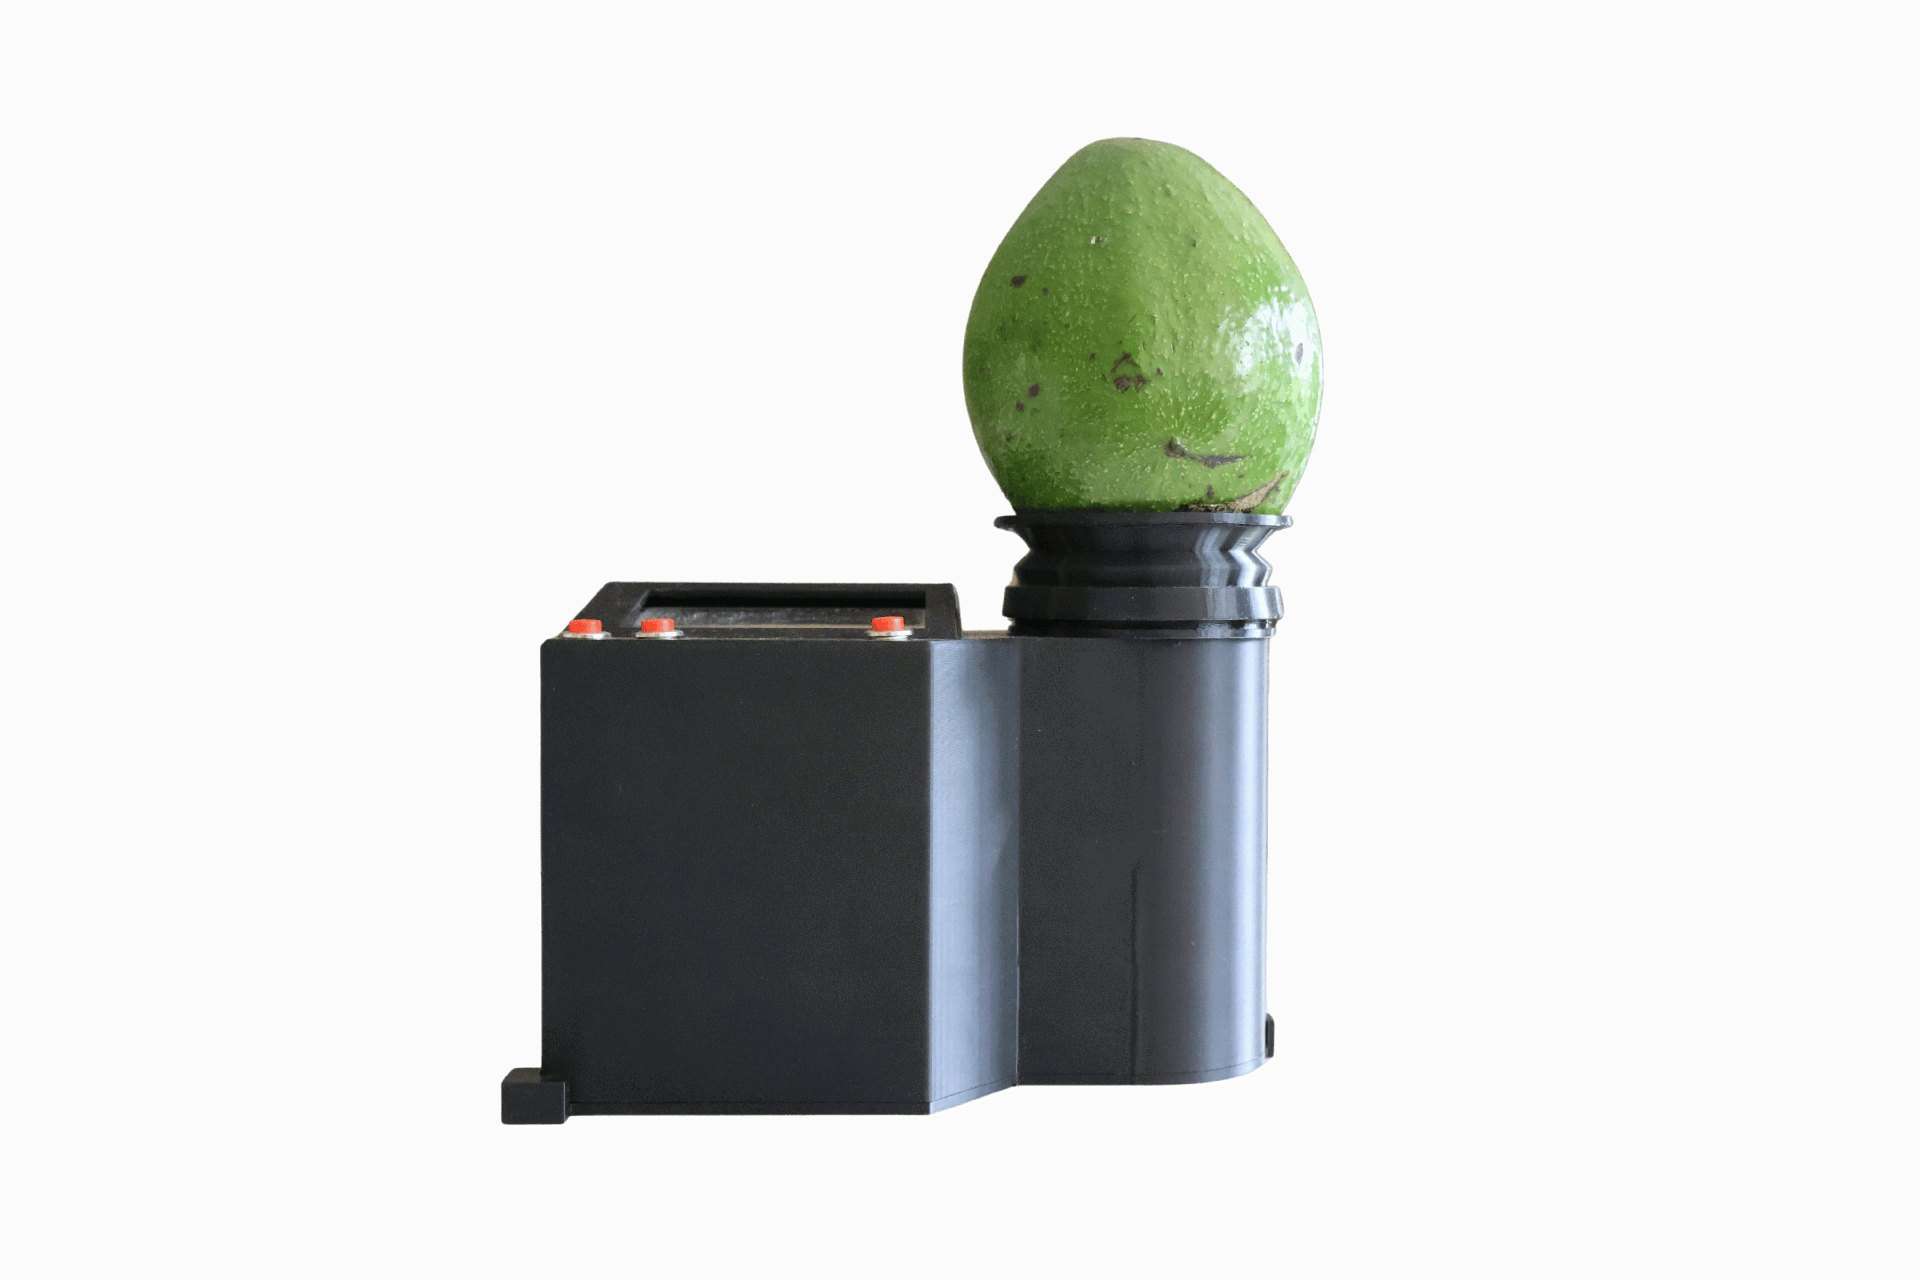
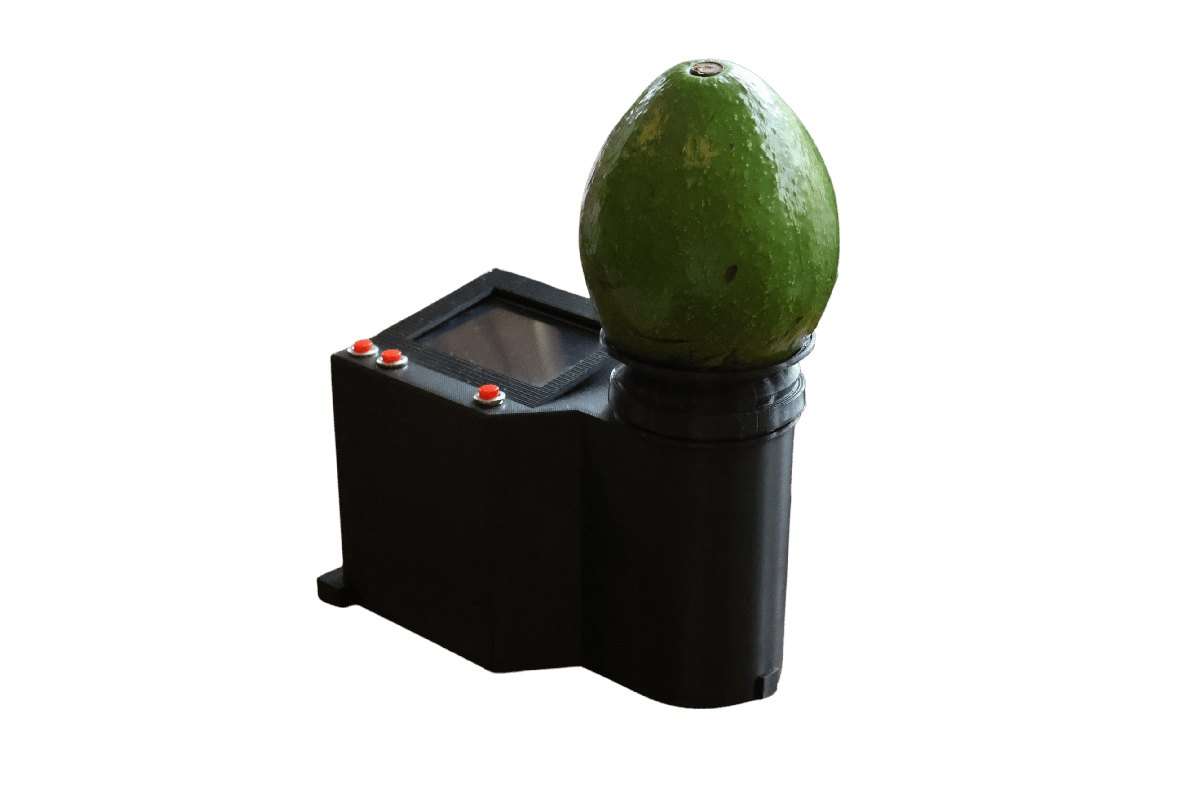
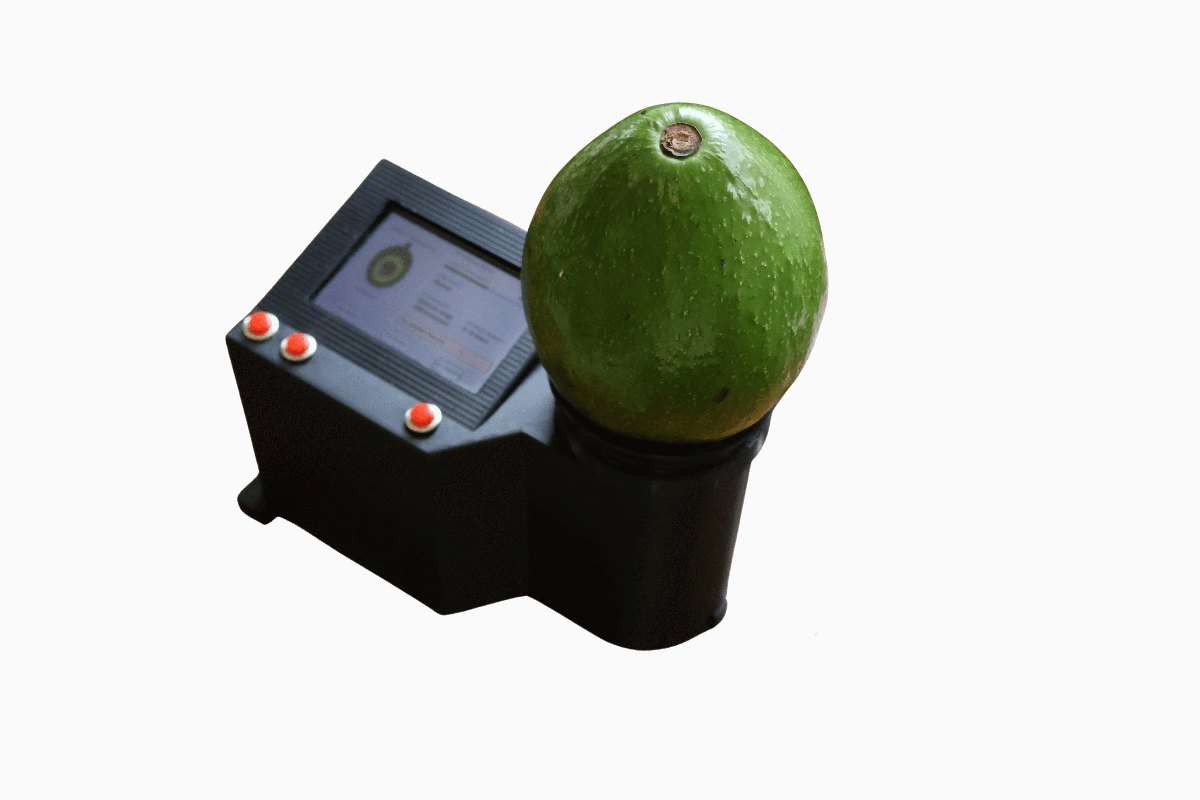
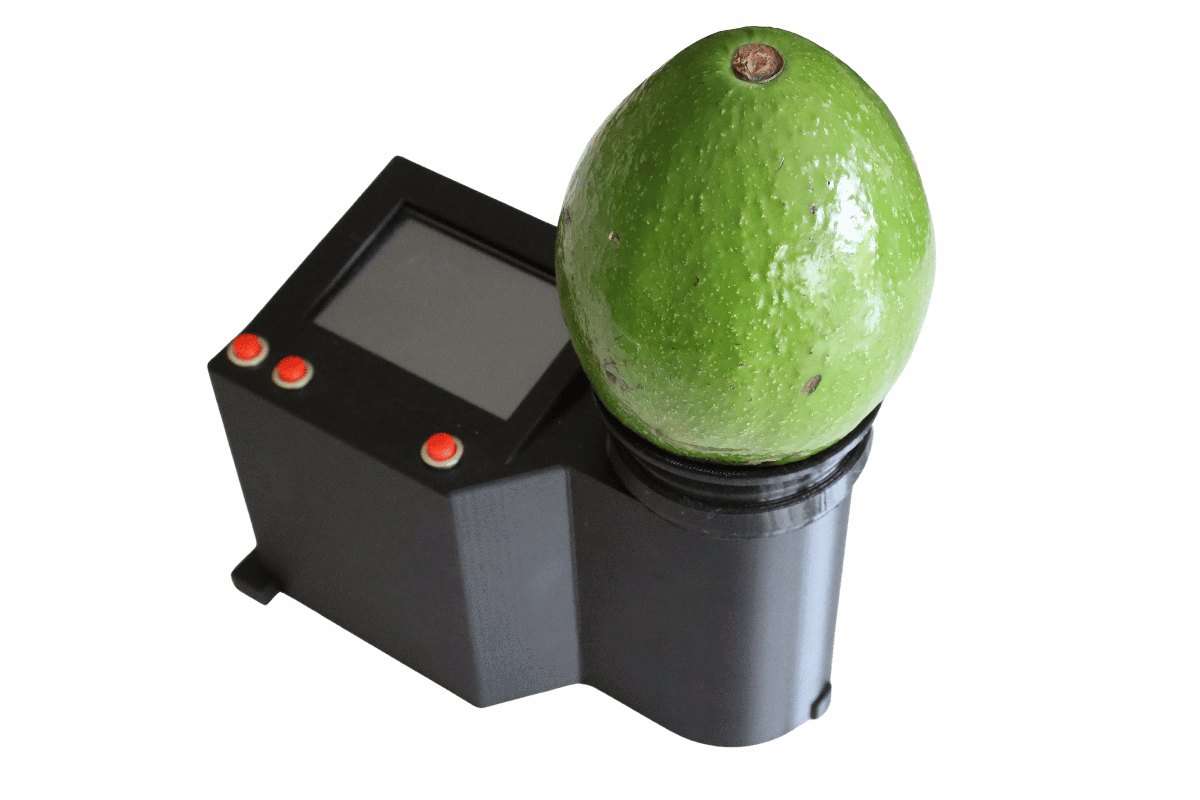
My answer was a prototype based on
Laser-Light Backscattering Imaging (LLBI). A
low-power laser shines onto the fruit, light scatters inside the
flesh, and a camera watches the glowing spot. How far and how evenly
that light spreads changes as the fruit ripens, so the scattering
image itself becomes a ripeness signal.
Finding the method
Before designing anything I spent weeks on literature: a 2024 review
of LLBI on agricultural products, studies of NIR penetration depth in
Hass avocados, Haralick's 1973 texture features, and the MobileNetV2
paper. Two decisions came out of that reading and shaped the whole
project:
1. Use two wavelengths. Red (650 nm) scatters near
the surface, while near-infrared (850 nm) penetrates deeper through
the thick exocarp, so I built the prototype to work with both and let
the data decide which one matters.
2. Compare two very different classifiers. A
classical pipeline with physics-informed features (gradient slope +
GLCM texture, classified by an SVM) against a deep-learning approach
(a MobileNetV2-based CNN), instead of assuming deep learning would
automatically win on a small dataset.
Designing the prototype: from AutoCAD to Inventor
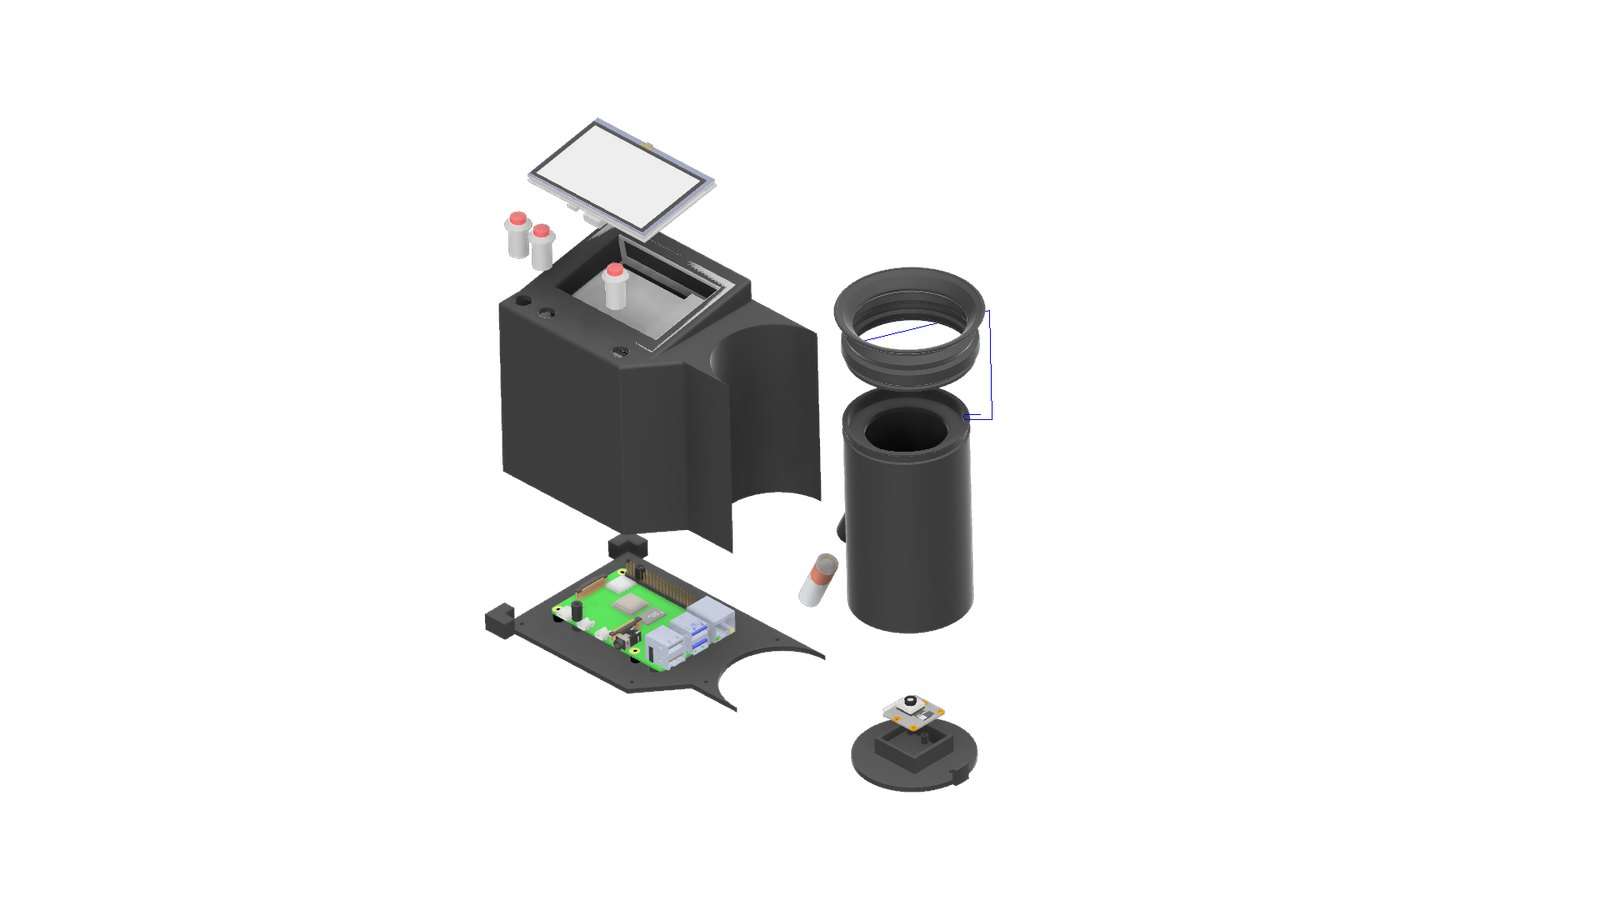
The mechanical design started as 2D drawings in AutoCAD, then moved
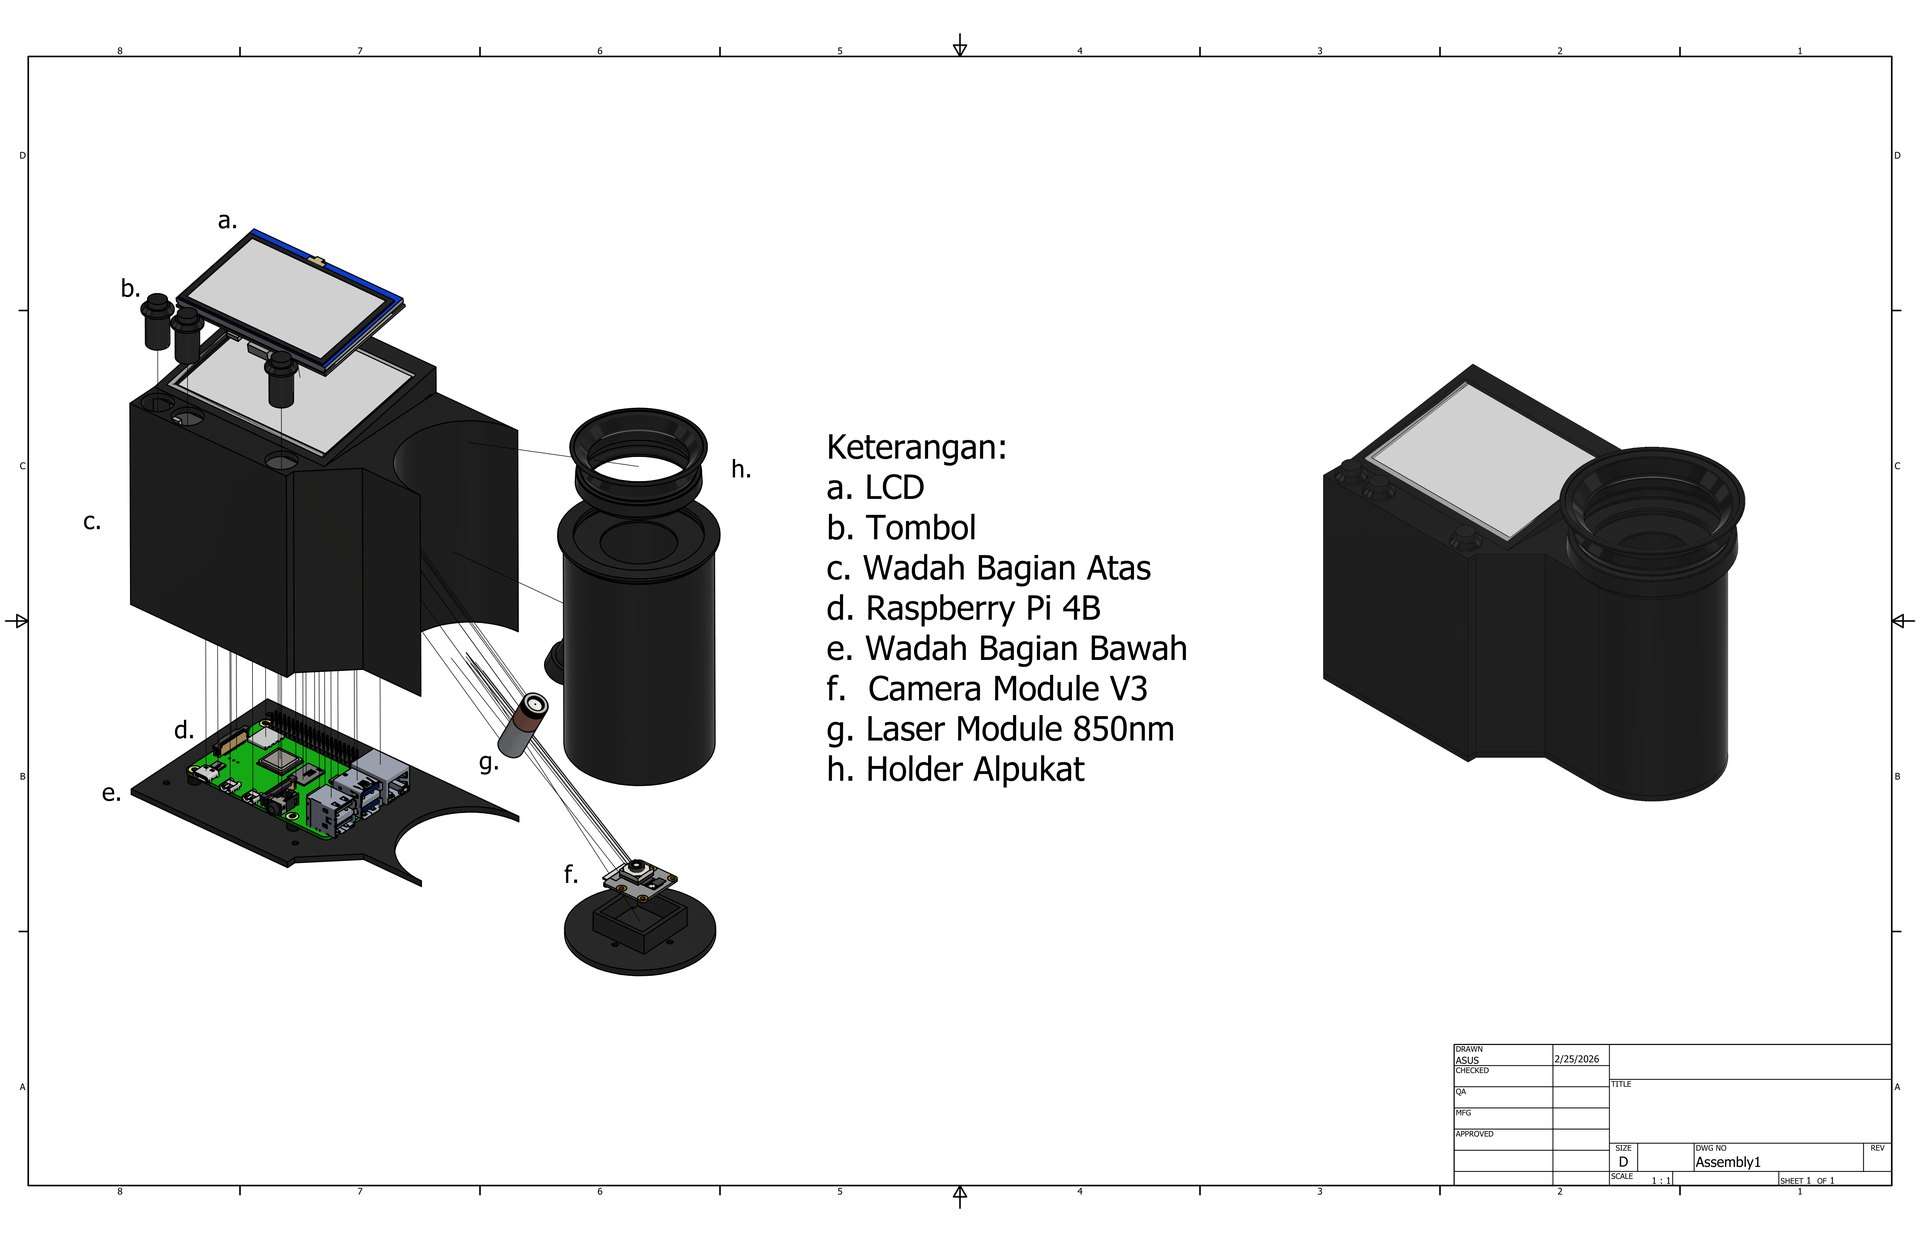
to Autodesk Inventor where the whole assembly came together. The body
is built around two dark chambers that isolate the camera from
ambient light: an upper chamber with the LCD, control buttons and the
laser window, and a lower chamber that holds the fruit on a custom
holder aligned with the laser and the camera module.
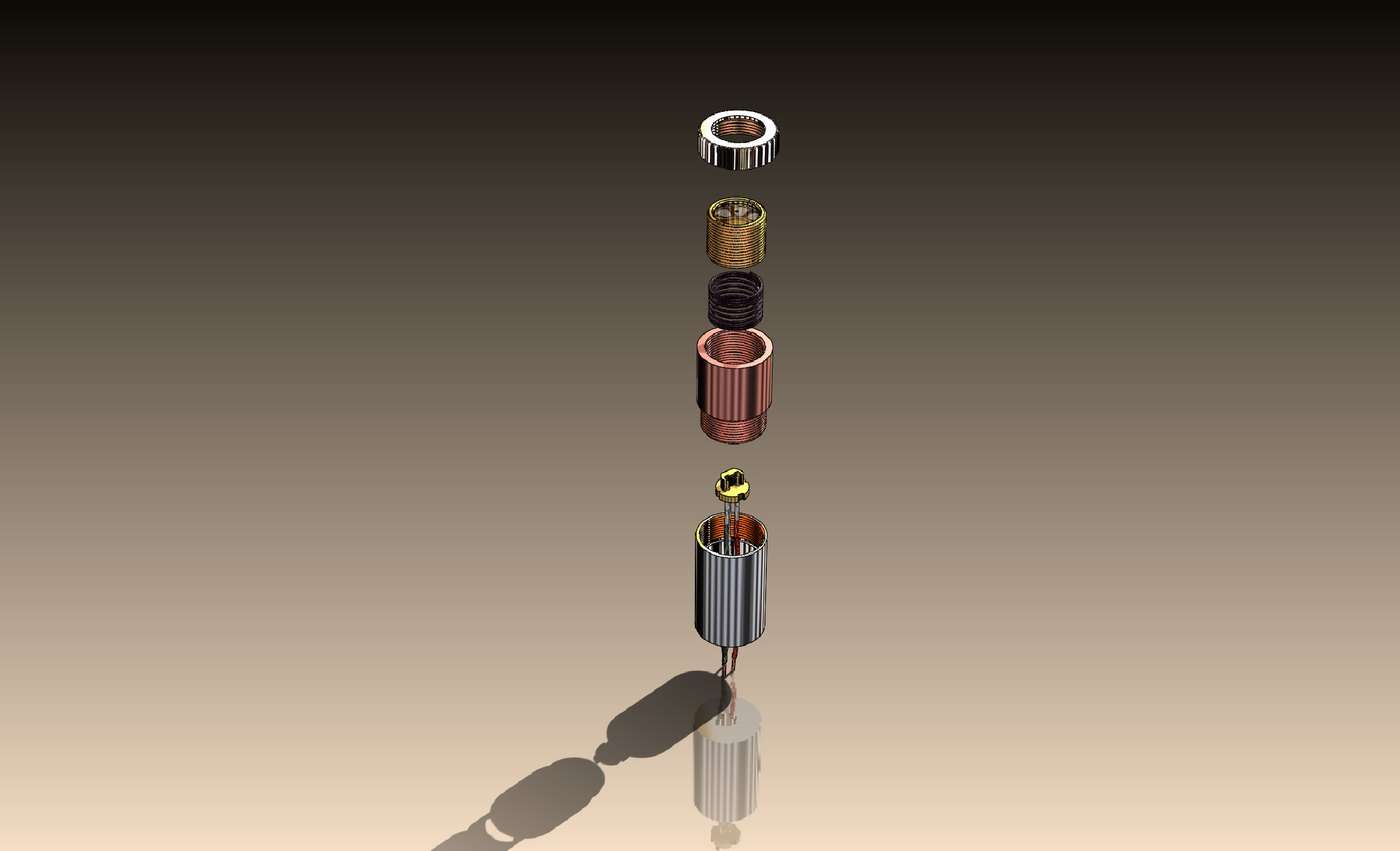
Exploded view: a. LCD, b. buttons, c. upper chamber, d. Raspberry Pi
4B, e. lower chamber, f. Camera Module V3, g. 850 nm laser module,
h. avocado holder. The shells and holders were 3D-printed from
STEP exports.
Everything was modeled iteratively (the Inventor version history
tells the story of many shell revisions), vendor models for the
Raspberry Pi 4B, the Sony IMX708 camera module and the 850 nm laser
module were imported to check fits, and the final parts were exported
as STEP files for 3D printing.
Electronics: from a sketch to a PCB
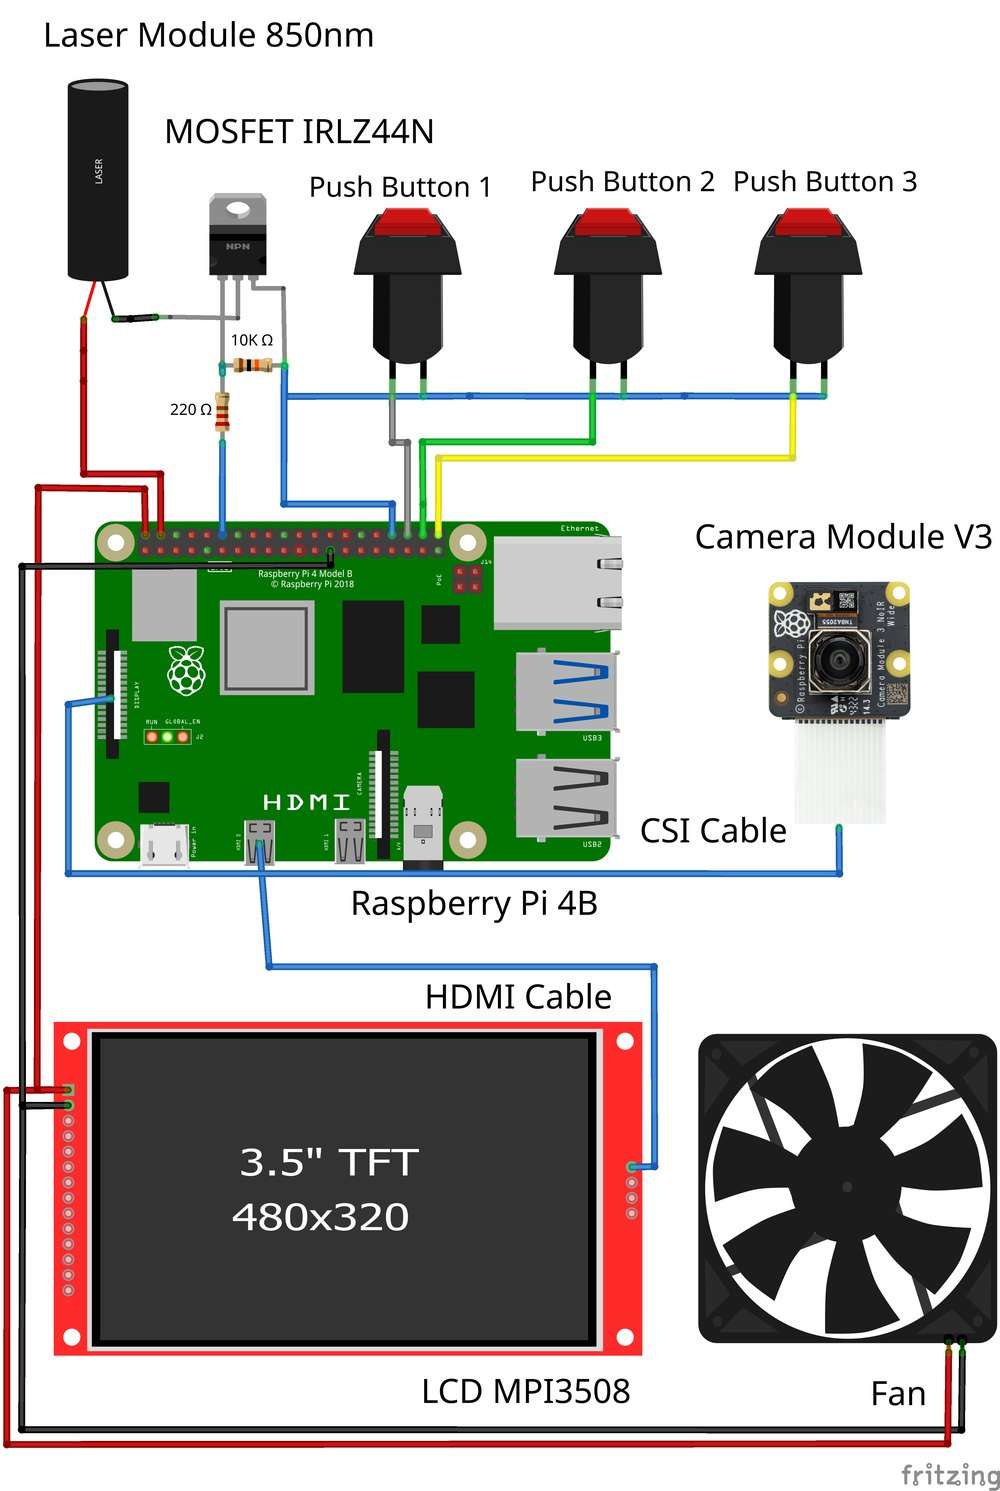
I sketched the wiring first in Fritzing, then redesigned it properly
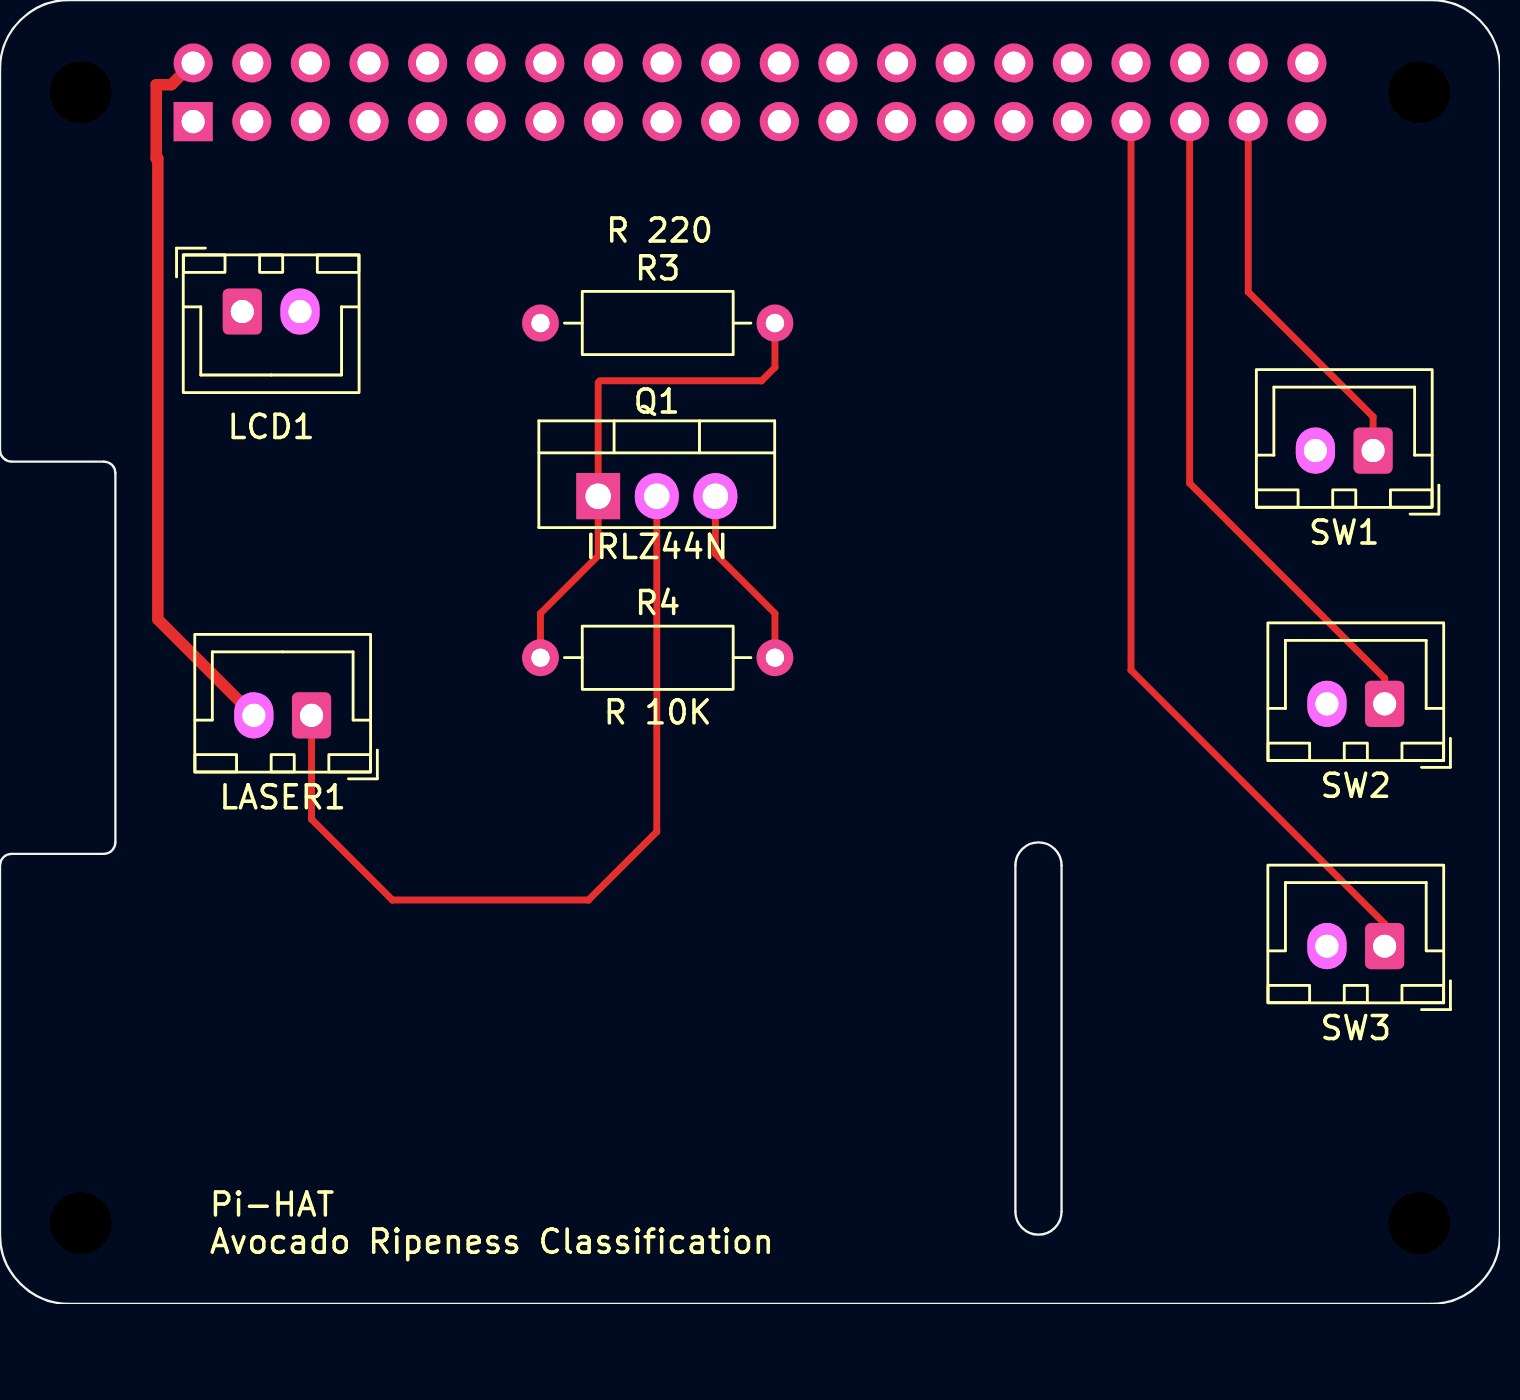
in KiCad as a schematic and a small 2-layer interface board. The
board carries three push buttons for the kiosk controls, a
transistor-driven circuit (MOSFET IRLZ44N) that switches the 850 nm
laser with hardware PWM, an LCD connector, and mounting holes that
line up with the Raspberry Pi as a Pi-HAT. Designing my own PCB,
rather than wiring everything loose, was one of the parts of the
thesis I am proudest of.
The full wiring diagram: 850 nm laser module driven by a MOSFET,
three push buttons, the Camera Module V3 over CSI, the 3.5" LCD
over HDMI, and a cooling fan.
The KiCad PCB layout, a Pi-HAT styled interface board: LCD, laser
driver, and the three buttons.
Building the dataset: 110 fruits, 14 days, two lasers
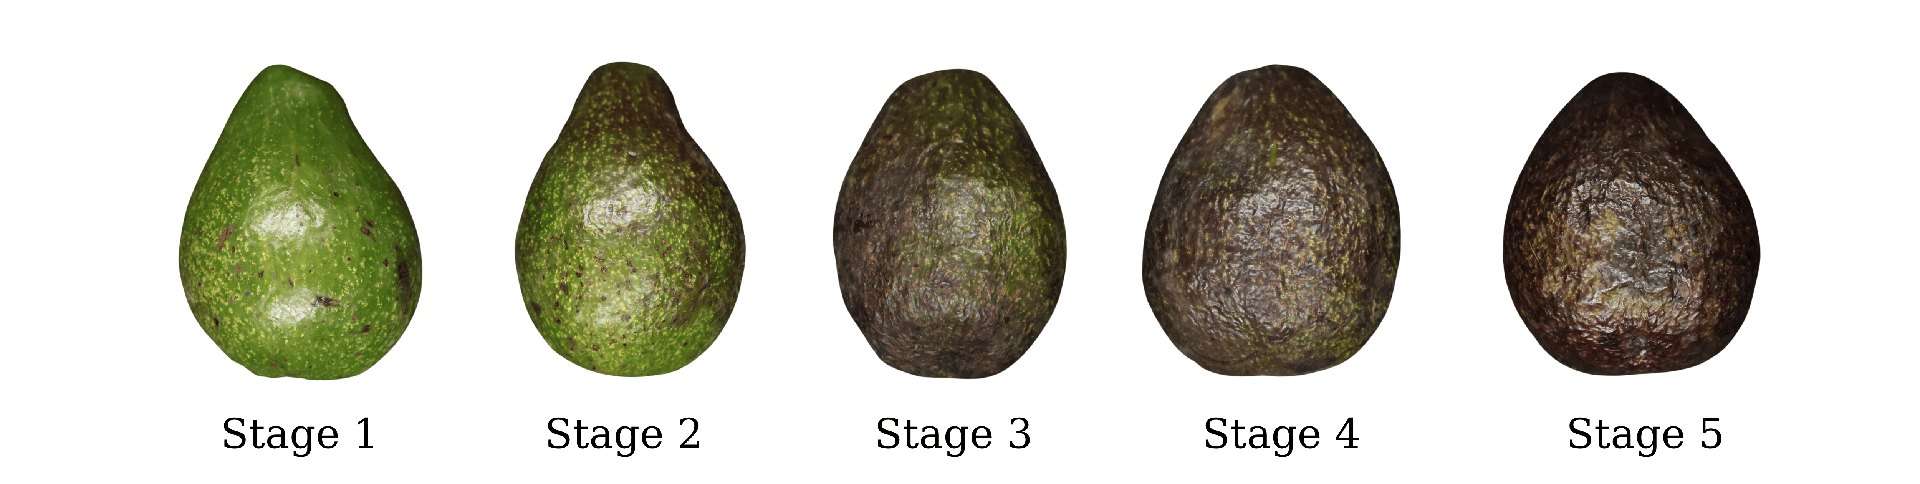
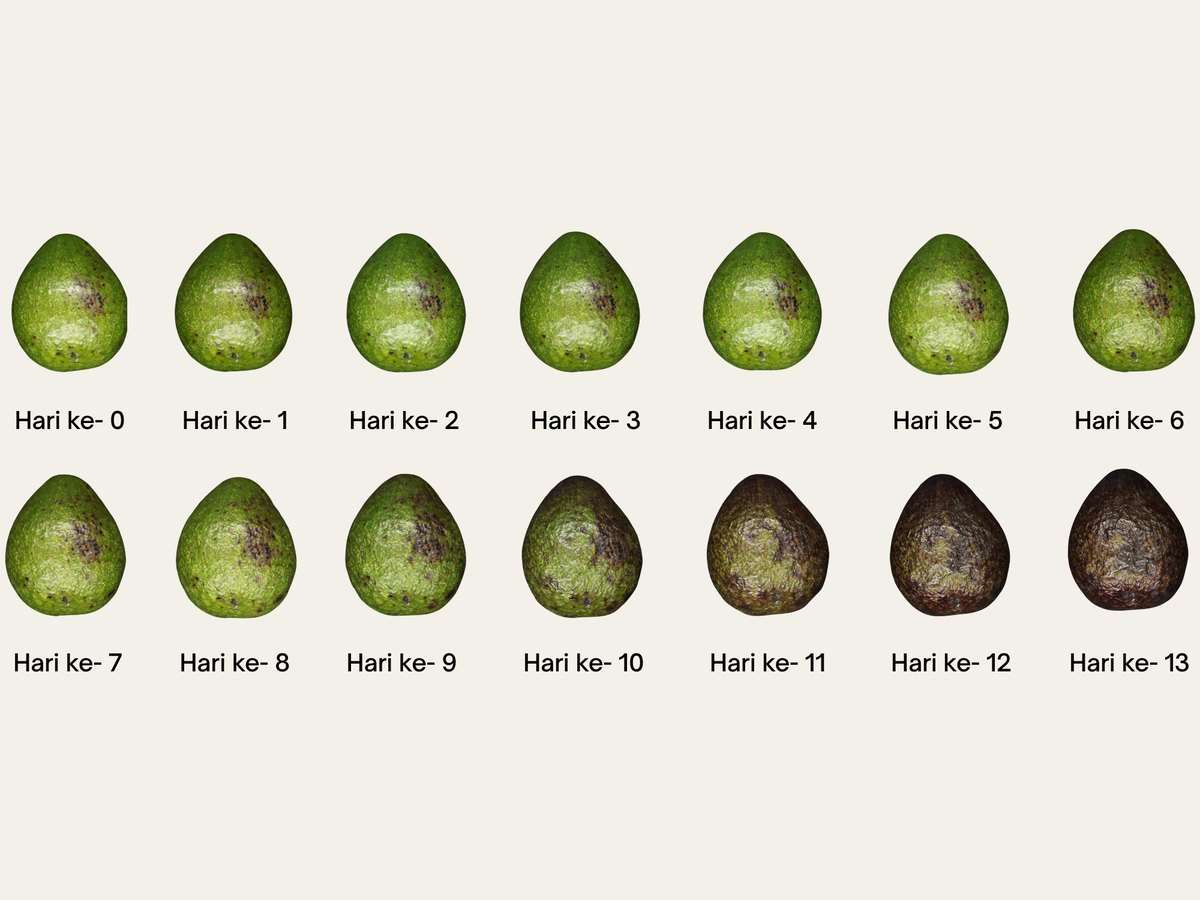
The ripeness stages used in the study, tied to penetrometer
firmness. The binary classification task splits at 67 N: Mentah
(unripe, ≥ 67 N) vs Matang (ripe, < 67 N).
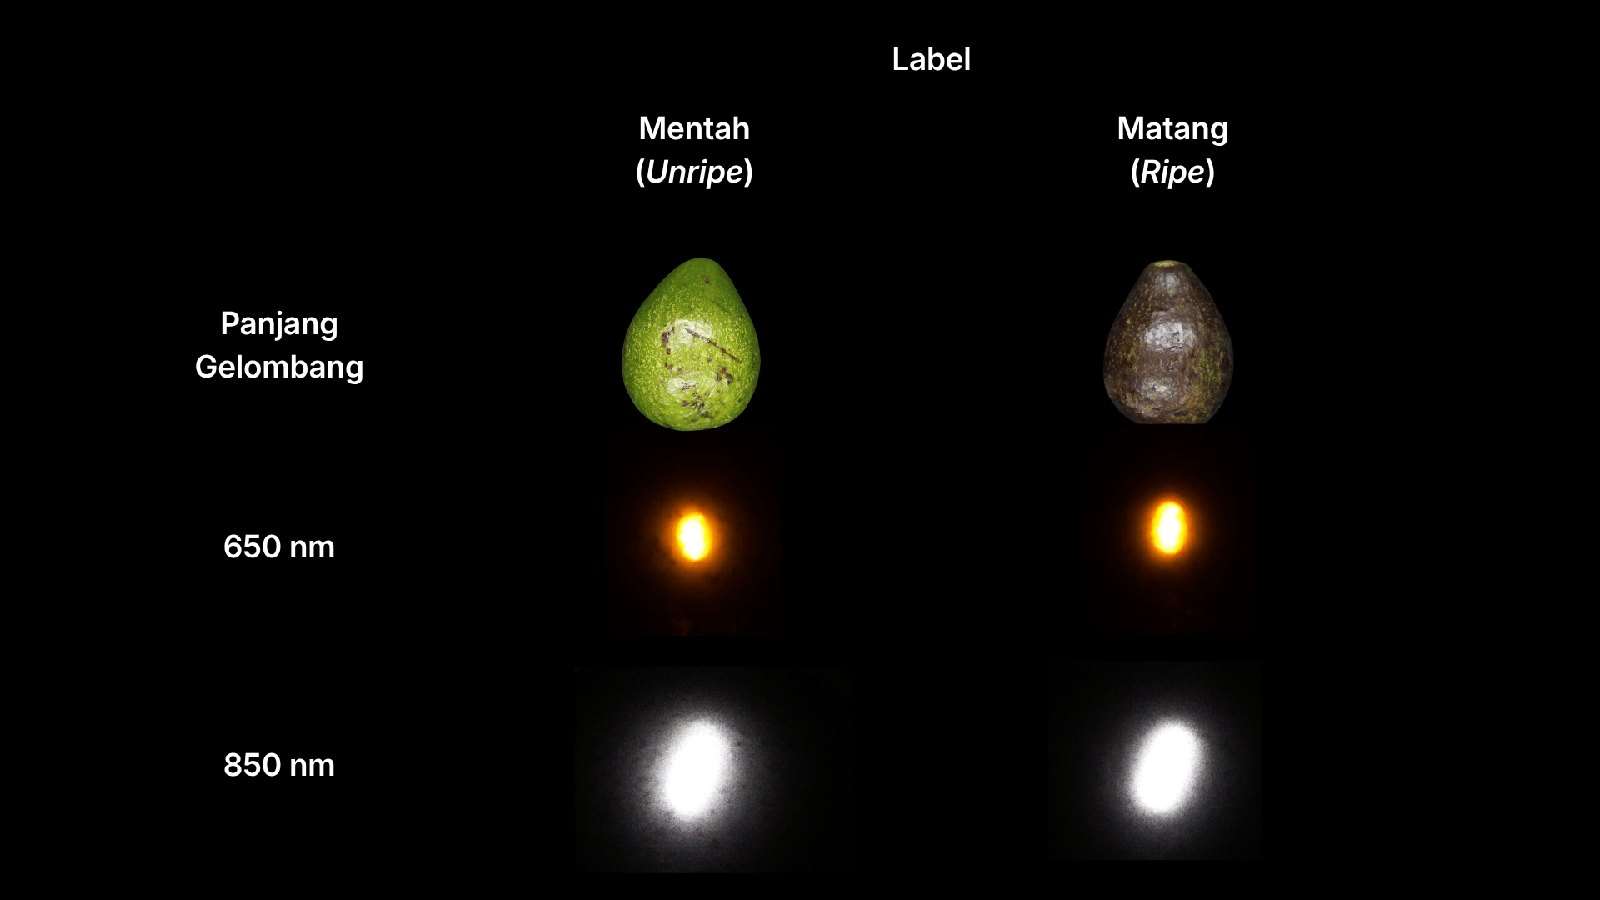
Mentah (unripe) vs Matang (ripe) at both wavelengths: the scattering
footprint changes with ripeness and gets sharper at 850 nm.
Machine learning: SVM vs CNN
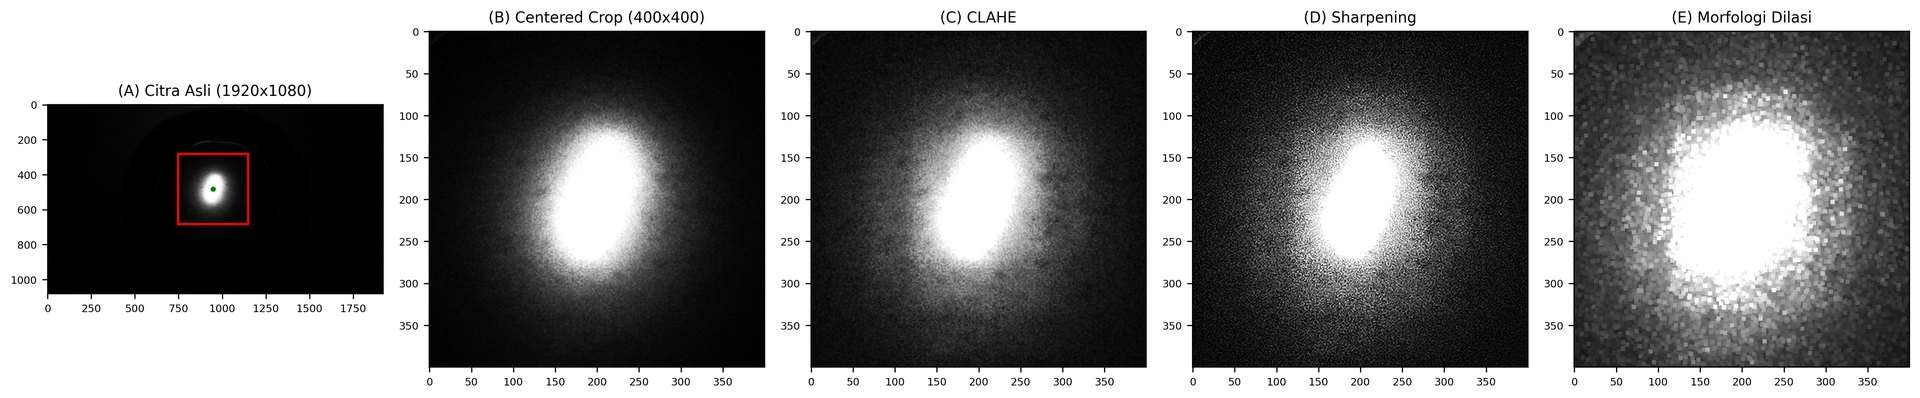
Both classifiers ate the same preprocessing pipeline (grayscale,
Gaussian smoothing, thresholding, centroid-crop to 400×400, CLAHE,
sharpening, dilation):
The SVM pipeline compressed each image into six
physics-informed features: the gradient slope between two annular
rings of the backscattering blob, plus five GLCM texture features.
The CNN pipeline fine-tuned a MobileNetV2 backbone
(ImageNet weights, frozen) with a small classification head on
150×150 inputs. Both were evaluated with a leakage-free nested 5-fold
protocol and then judged once on the 16-fruit external holdout.
The preprocessing chain every image went through before feature
extraction.
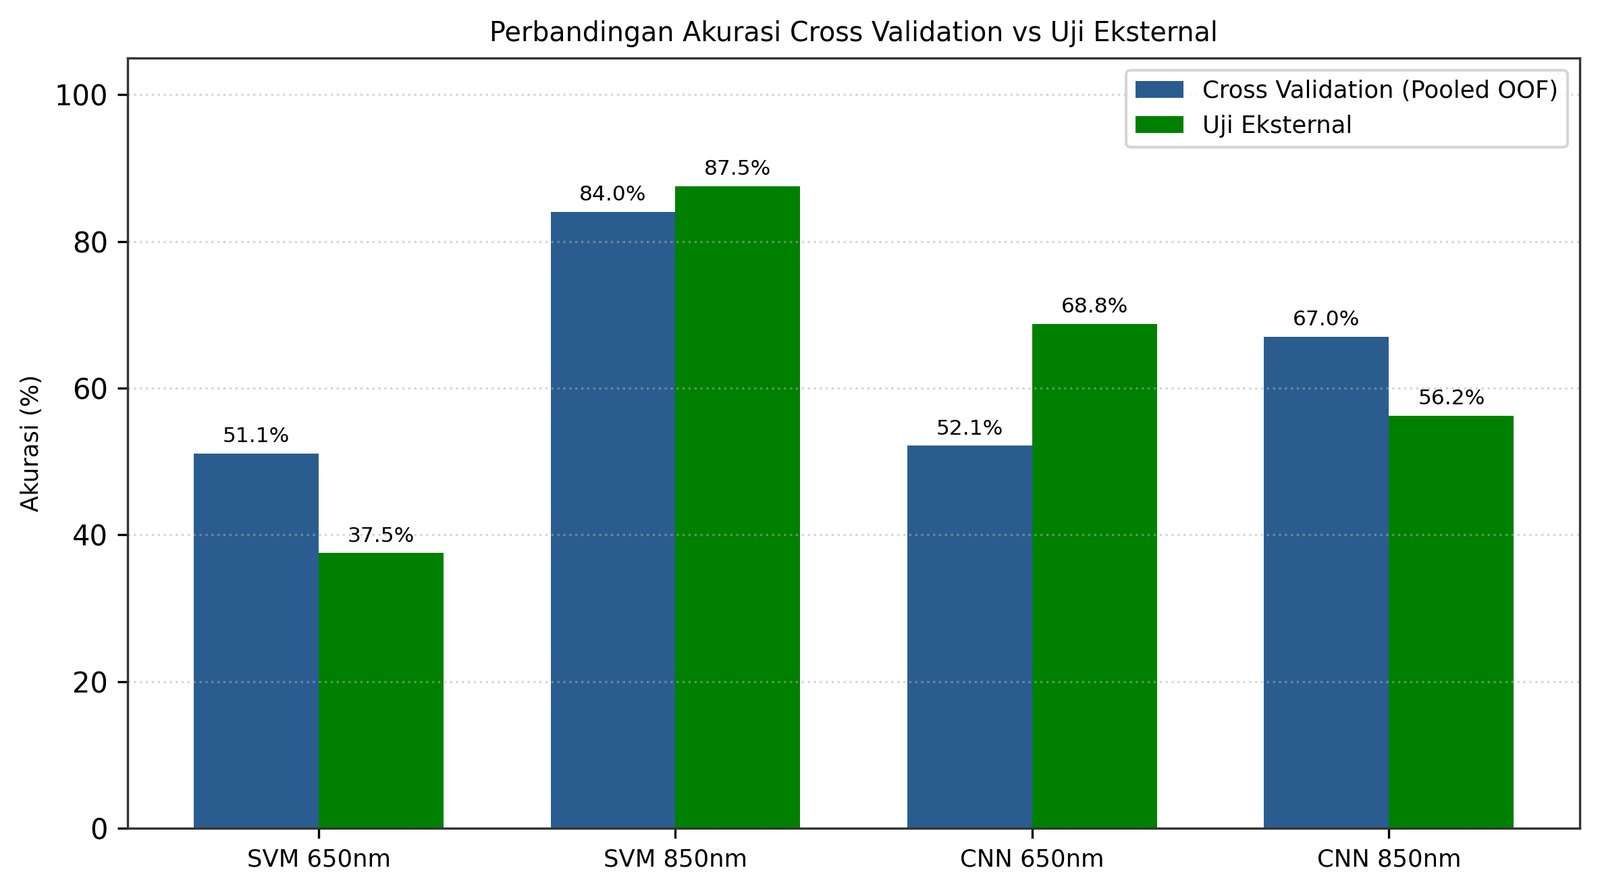
Model
CV (94 fruits)
External holdout (16 fruits)
SVM, 850 nm (slope + GLCM)
84.04% (AUC 0.914)
87.5% (AUC 0.900)
CNN, 850 nm (MobileNetV2)
67.02% (AUC 0.750)
56.25%
SVM, 650 nm
51.06%
37.5% (chance level)
CNN, 650 nm
52.13%
68.75%
The honest takeaways were the best part of the thesis.
Wavelength mattered more than the classifier: 850 nm
beat 650 nm significantly (p = 0.0054) because NIR light reaches
deeper into the flesh.
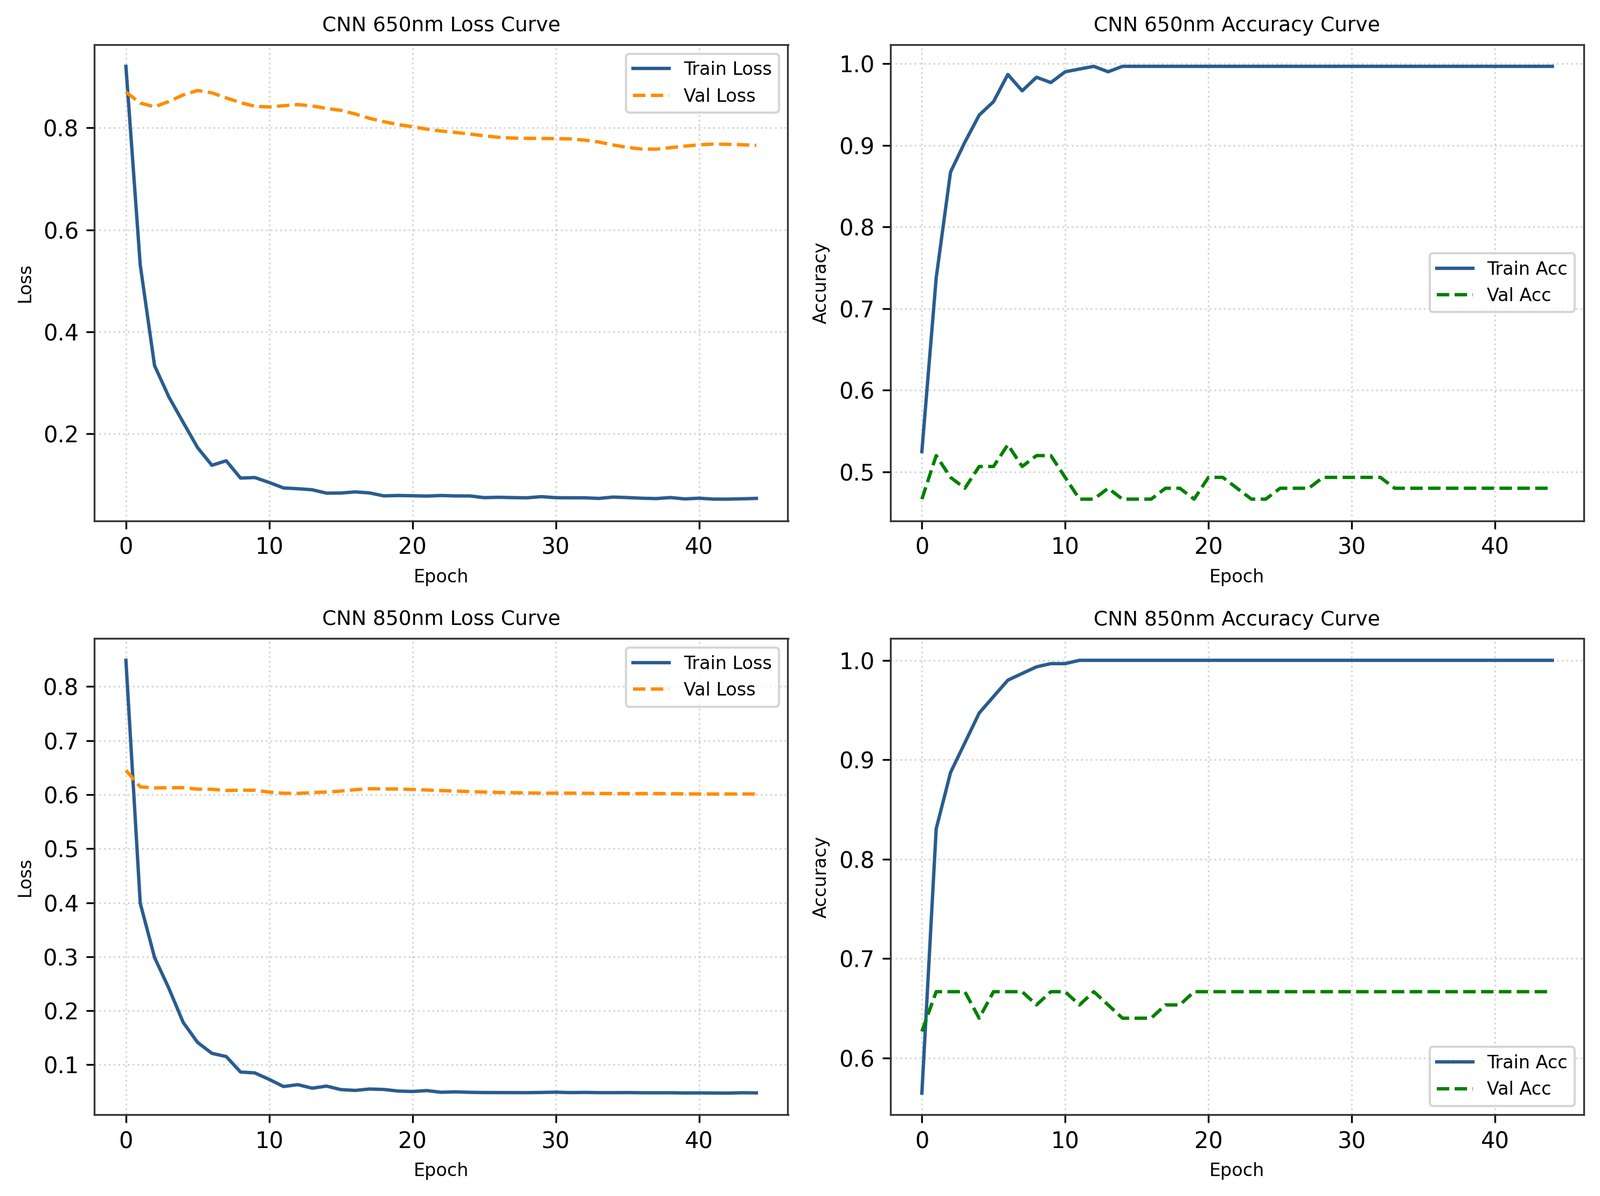
The SVM beat the CNN: with only 110 fruits, the
physics-informed features generalized better while the deep model
overfit. Getting a clean, explainable 87.5% on fruit the model had
never seen felt far better than a bigger number I could not trust.
CNN training curves: the moment it became clear the model was
memorizing a small dataset.
Generalization gap between the SVM and CNN pipelines.
Running on a Raspberry Pi 4B
The winning SVM shipped to the device as a joblib model. When a scan
starts, hardware PWM drives the 850 nm laser for a ~300 ms pulse, the
IMX708 camera captures a lossless BMP with locked exposure, the same
six features are extracted, and inference runs in about half a
second. A full three-point scan (rotating the fruit between points)
finishes in ≈ 1.98 s end to end, measured on the Pi
itself.
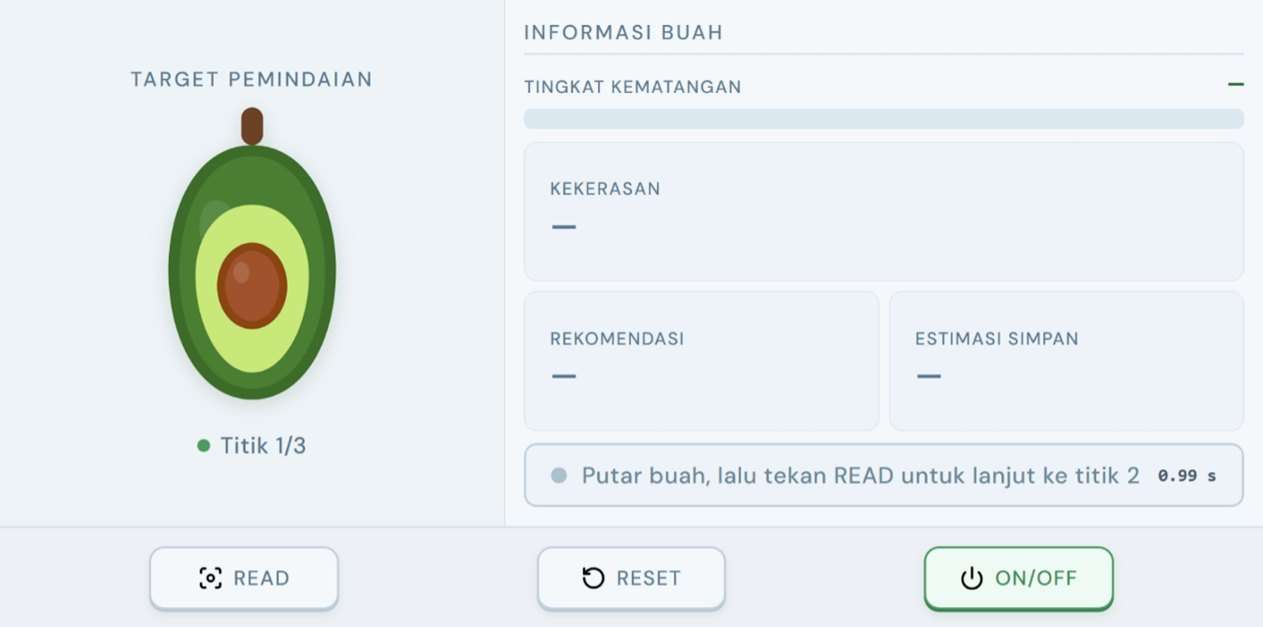
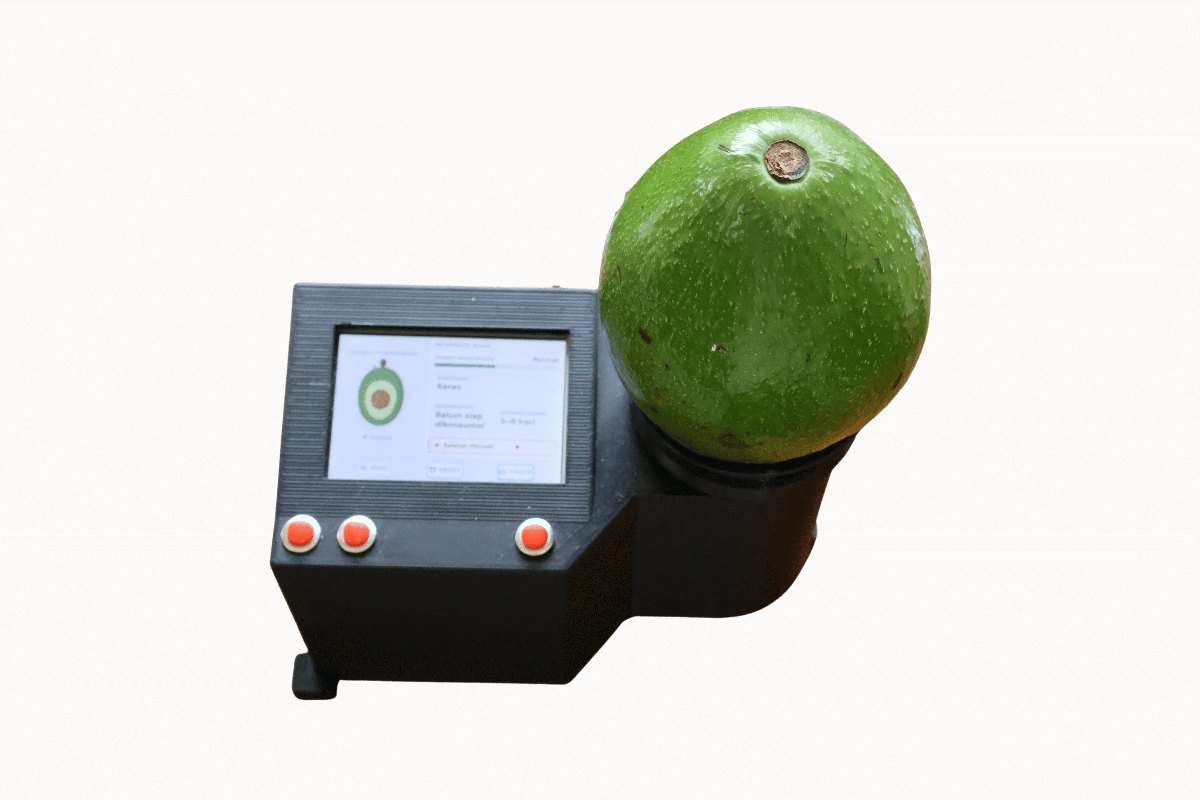
The interface is a React app bundled into a single file, served by a
small Flask server over Server-Sent Events, and displayed fullscreen
on the prototype's 3.5" LCD. Three physical GPIO buttons control
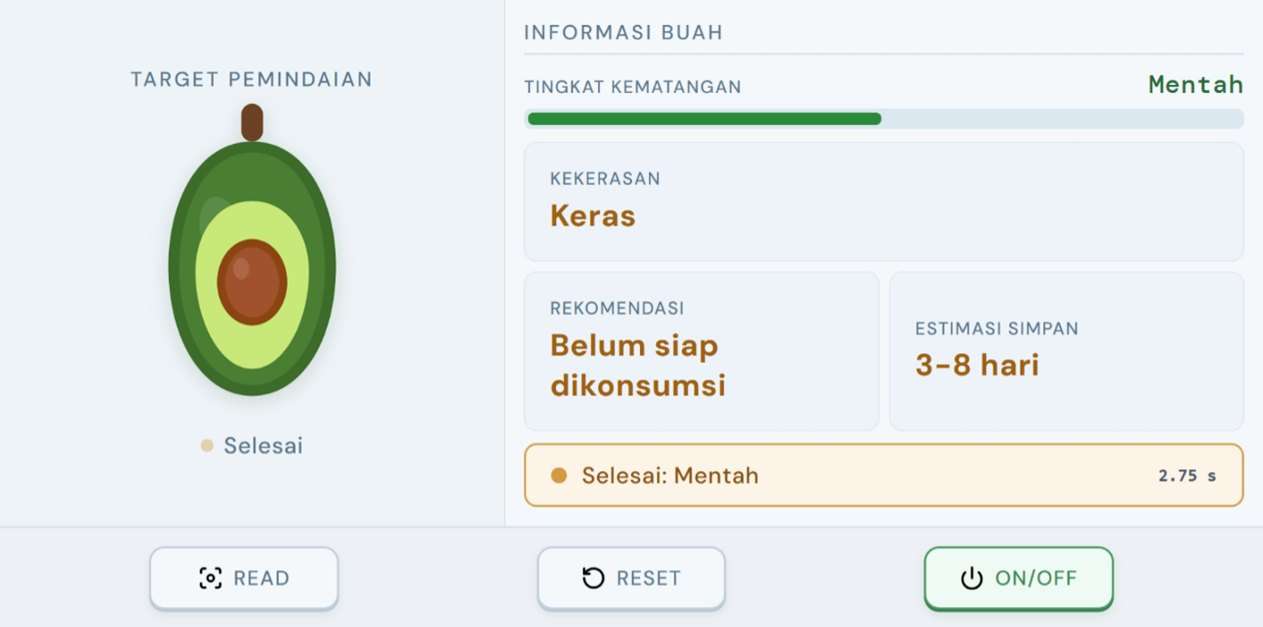
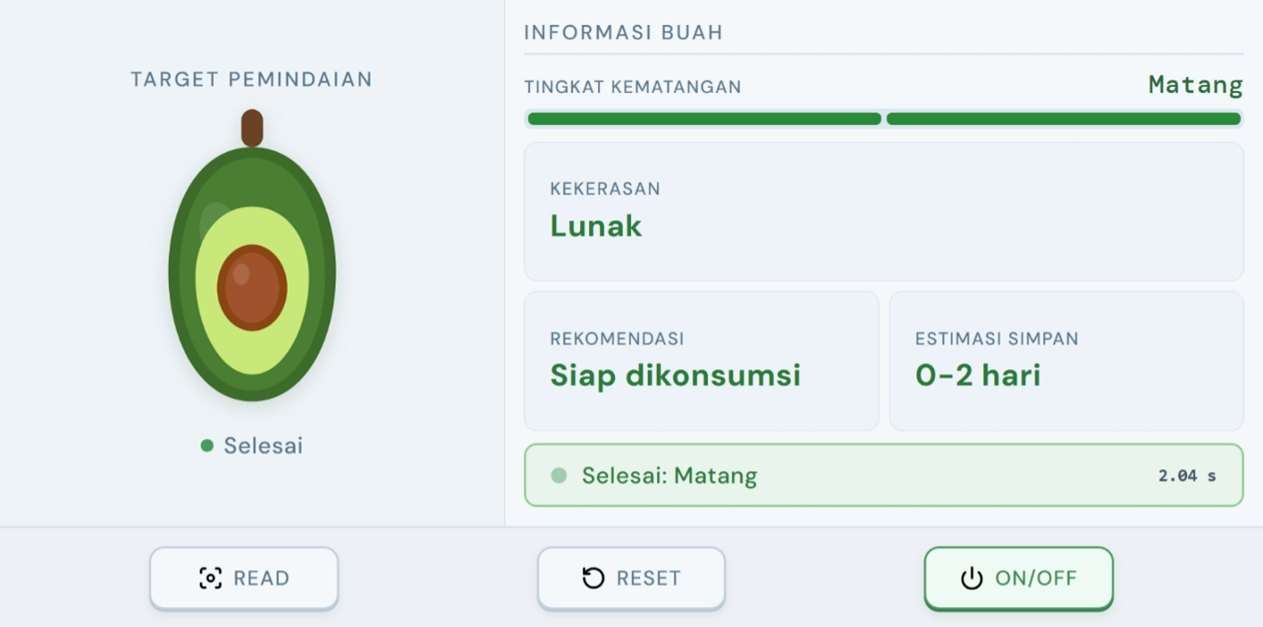
dummy scan, real scan and reset, and power. The screen reports the
ripeness class, firmness category, a recommendation, and an estimated
shelf-life window.
The kiosk UI in its idle state.
Result screen: ripeness class, firmness, recommendation, and
shelf-life estimate.